This happens to me a lot. I go into a store with the intent of buying something. Let’s say a pair of pants. And more times than not, I go home empty handed. Why is that?
I spend a lot of time weighing the pros and cons of a buying decision. And I don’t mean things like a car or a house. Those too, of course. But I mean things like the above mentioned pair of pants. Or a home stereo. Or ice cream.
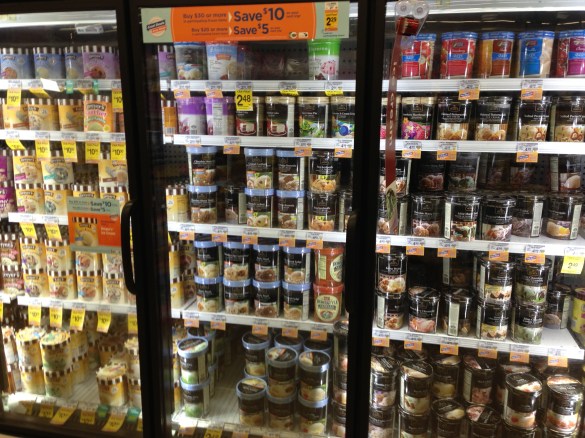
I took this picture today, in a Ventura grocery store. This is just too much choice for me! When there are 23 different flavors and brands of chocolate ice cream, I will always wonder: “What if the flavor next to is better than the one that I just bought?” I will not be able to select a product and feel confident that I made the best possible choice.
I hate buyer’s remorse. Probably because I made too many bad buying decisions in the past. I wonder how much money I spent on purchases I later regretted? That dress shirt that ended up being just too small, the membership in an animal rescue club that I agreed on in the pedestrian zone, or the two liter bottle of tonic water.
I hate buyer’s remorse. I hate it so much, I’d rather walk out of a store than buy the pair of pants the fit decently.
[EDIT]:
Philip pointed out a TED video to me, which really hit the nail on the head:
tl;dr:
Why choices make people miserable:
- Regret and anticipated regret
- Opportunity costs
- Escalation of expectations
- Self-blame