
One of the things that are high on my priority list of home improvements is to replace the ceiling lights that the previous owners left behind. Both the living room and dining room chandeliers are not at all to my taste, and with the added let down of daylight fluorescent bulbs they really don’t add to a homey feeling at all.

The existing chandelier
The existing chandelier was not only a sore sight in the center of the open layout living space, it was also hung off center to both the patio door and the kitchen island.
I had a West Elm gift certificate and while I tried to figure out what to spend it on, one of their pendant lights, plainly called Globe Pendants, caught my attention. They were on special, so I decided to go with them and take a first step towards a more hospitable living space!
After the initial ceiling inspection to determine where the pendants should go (I decided to go with two small ones), it became clear that there would be a joist between the two new junction boxes. I had asked Erick for help, and he was not enthusiastic about the prospect of having to drill through a joist in order to run a wire between them. Given the uncertainty around how we’d achieve connecting the two lights, we decided to limit our first trip to Home Depot to a hole saw, get into the ceiling and go from there.
In my research leading up to this project I saw a YouTube video where they used an adjustable hole saw with a debris catcher! I thought that was so neat, so that what I went with at Home Depot, surprising even Erick with its existence.
Erick decided to let me do the drilling and be responsible for potentially misplacing the holes—which thankfully didn’t happen. Much to our delight we found that the joist even had a pre-cut hole, once we had access to the ceiling. Which made our mission considerably easier, given that we didn’t have to drill a hole ourselves, or use another hole three feet away, all the while operating through two 4-inch openings.


Pushing the piece of wood out of pre-cut hole in the joist ended up being the bulk of the work in getting these lights installed actually. With the limited amount of room it was hard to generate enough force to literally make a dent. We eventually succeeded though, and the rest of the installation was a breeze.
Given the length of the pendant wiring we decided to just run the wiring of one of them through the hole and connect both lamps to the existing cable, using the junction box only to affix the lamps to it.
Back at Home Depot we got some bigger wiring nuts that would be able to hold three wires, two junction boxes, a precision screwdriver set, and a cover plate for the existing box. We probably could have gone without the screwdriver set, but we needed something small to adjust the height of the lamps and I thought it could be a good investment.
For the rest of the installation, Erick screwed in the brace and installed the first box, running the cable through that and to the other side of the joist. At that point it was already time to test the height of the pendant, which—according to the internet—was ideally set at 30 inches above the table.


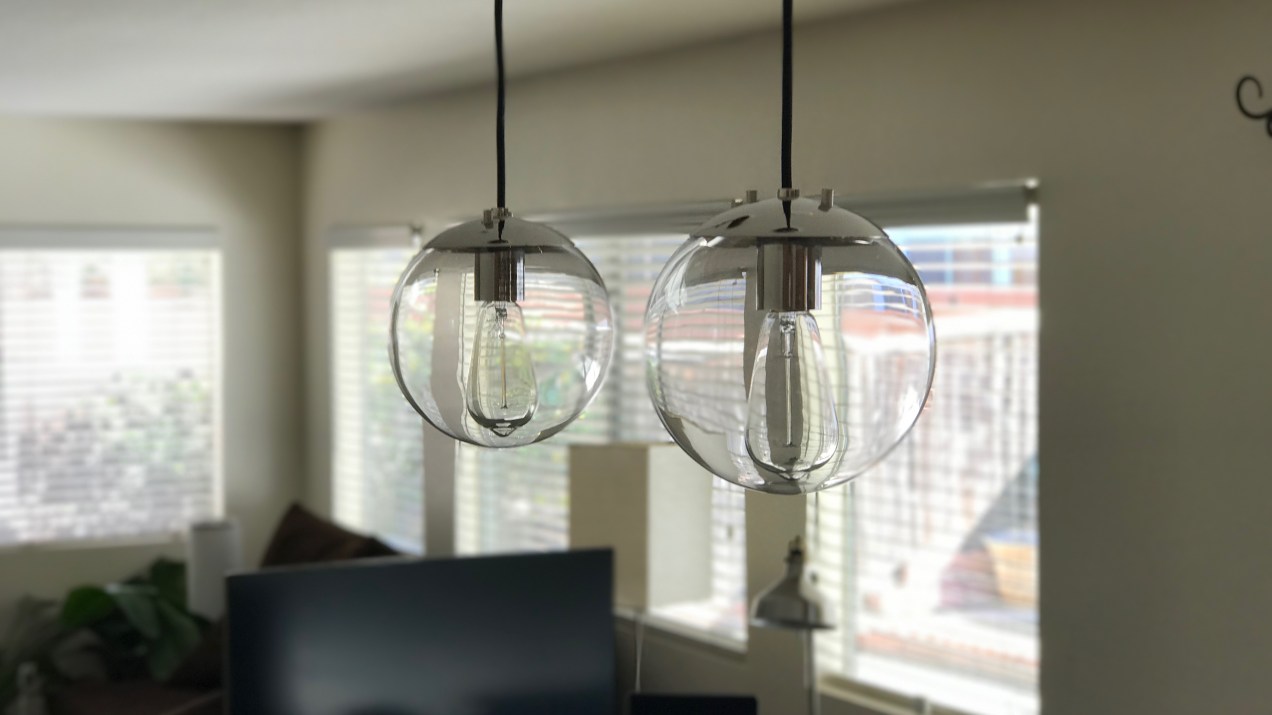
Once we verified the hight, Erick connected the wires and installed the second junction box. All that was left then was to adjust the second lamp to be level with the first and install the remaining hard ware!


Perfect😆